


User and Permission
Module Overview
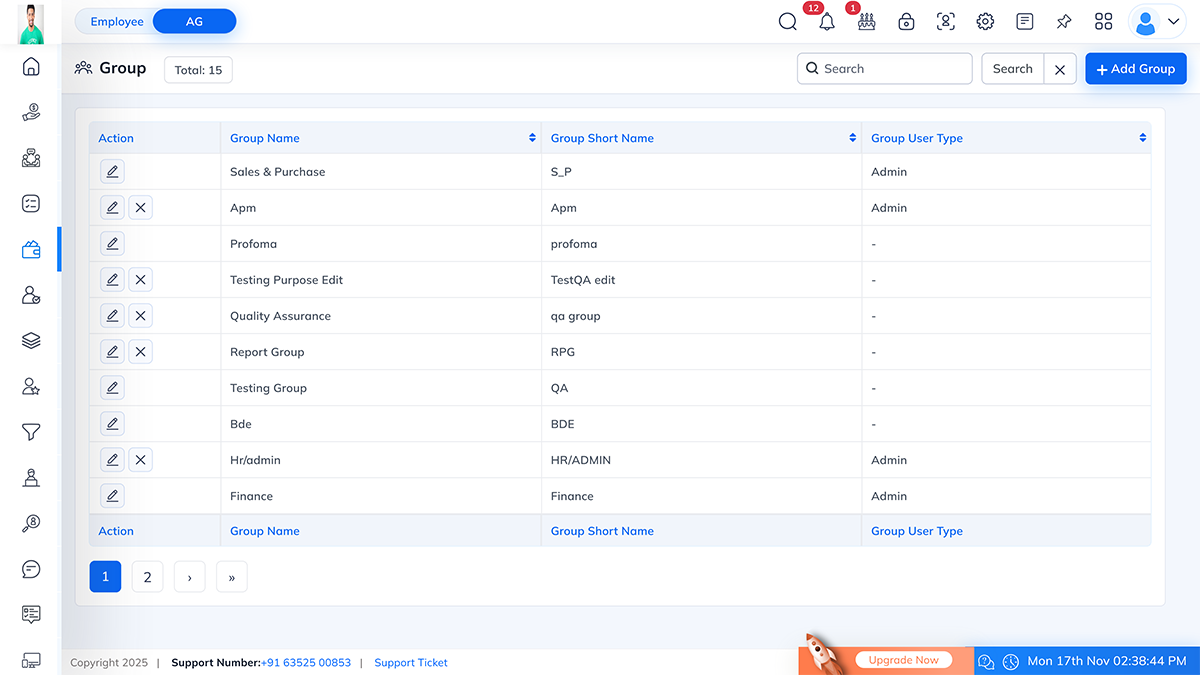
The Group Module allows administrators to create and manage different user groups within the system. Each group defines a set of permissions and access levels for specific functionalities like Employee, Finance, Project, CRM, etc.
This feature ensures proper role-based access control and simplifies permission management.
Detailed understanding of this module is required to effectively use semsto, this module also ensure that un-authorized person not access important information.
Fields
- Group Name: Displays the full name of the group (e.g., Sales & Purchase, HR/Admin).
- Group Short Name: Displays the abbreviation or short code of the group (e.g., S_P, HR/ADMIN).
- Group User Type: Shows the group type as either Admin or Employee.
Available Actions:
- Edit: Update group details or permissions.
- Delete: Remove an existing group permanently.
- Add Group: Create a new group.
Additional Features:
- Search Bar: Quickly find a specific group by name or short name.
- Pagination: Navigate through multiple pages if there are many groups.
- Total Count: Displays the total number of groups created.
Add / Edit Group Page
Navigation
Fields:
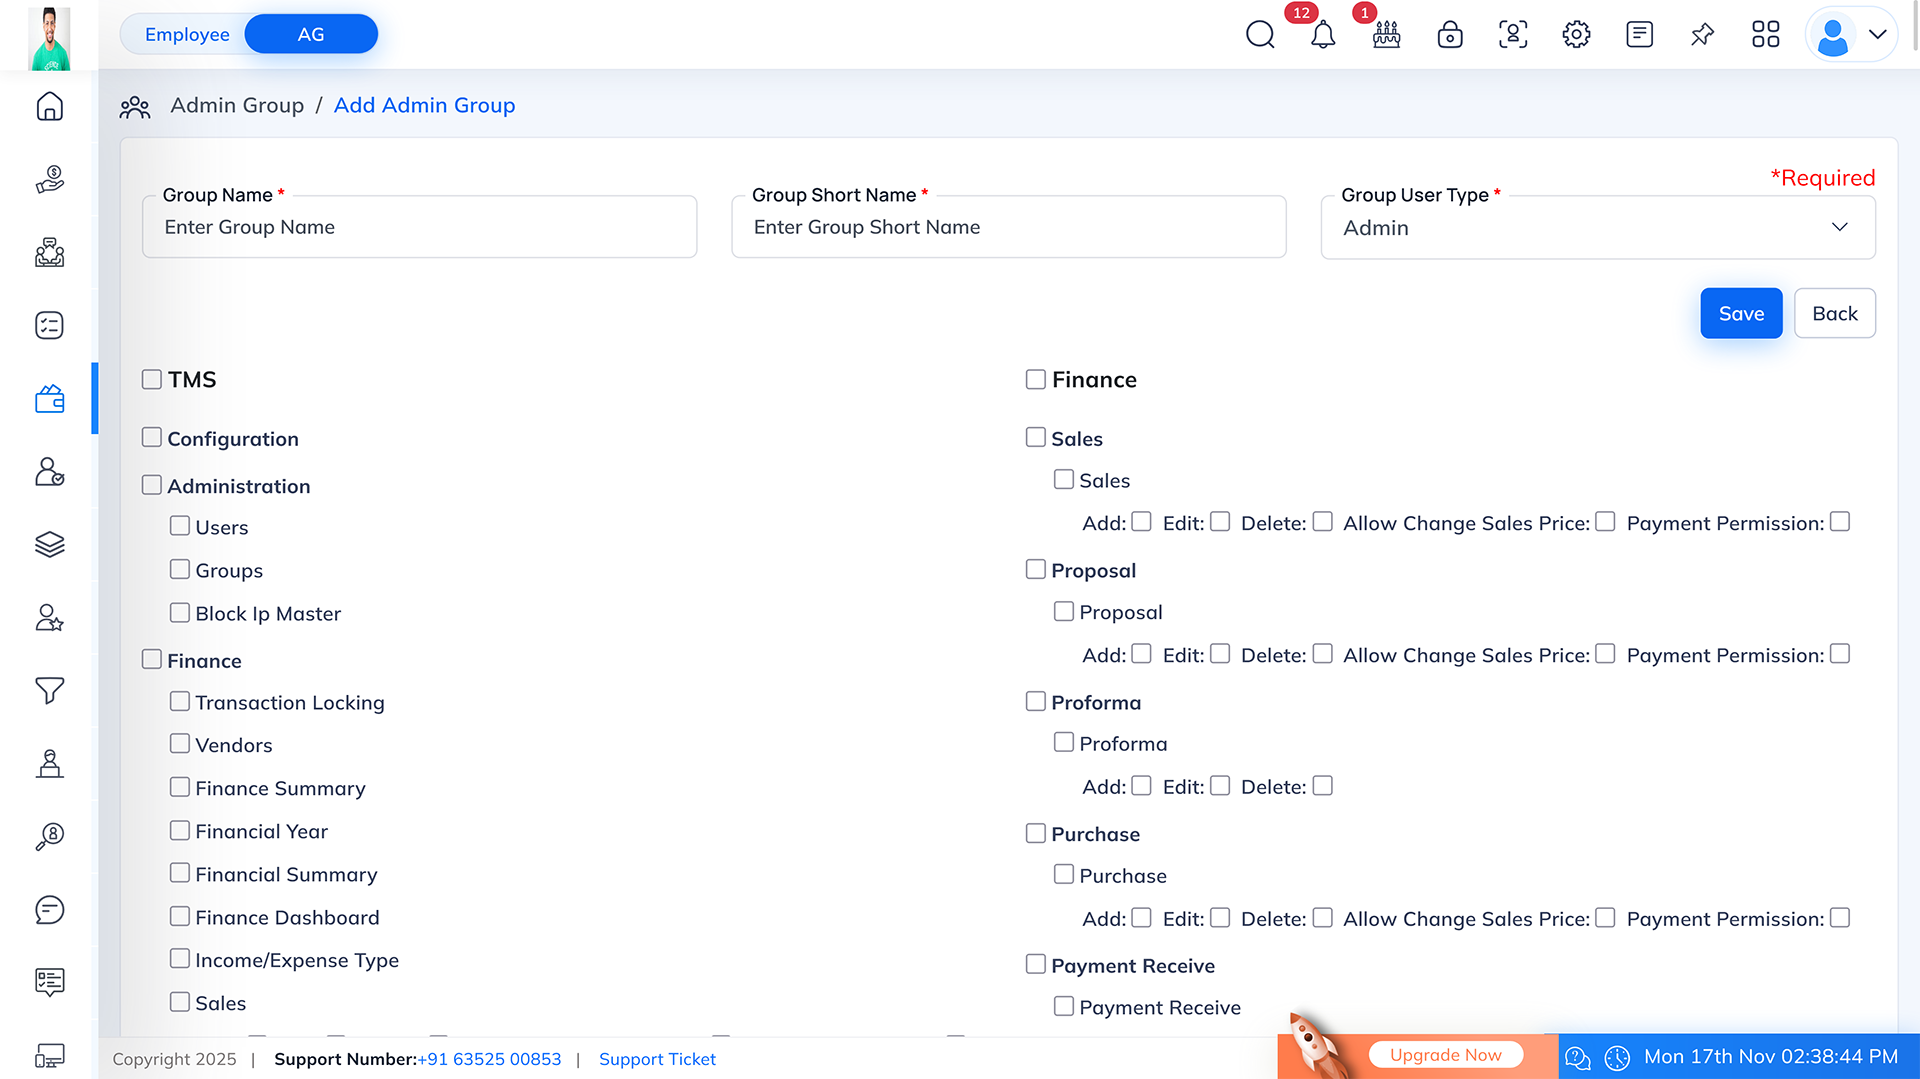
- Group Name (Required): Enter the full name of the group. Example: HR/ADMIN, Sales & Purchase.
- Group Short Name (Required): Enter a short identifier for the group. Example: HRADMIN, S_P.
- Group User Type (Required): Select the type of users assigned to this group:
- Admin: Full access to system configurations and reports.
- Employee: Limited access based on assigned permissions.

Permission Settings
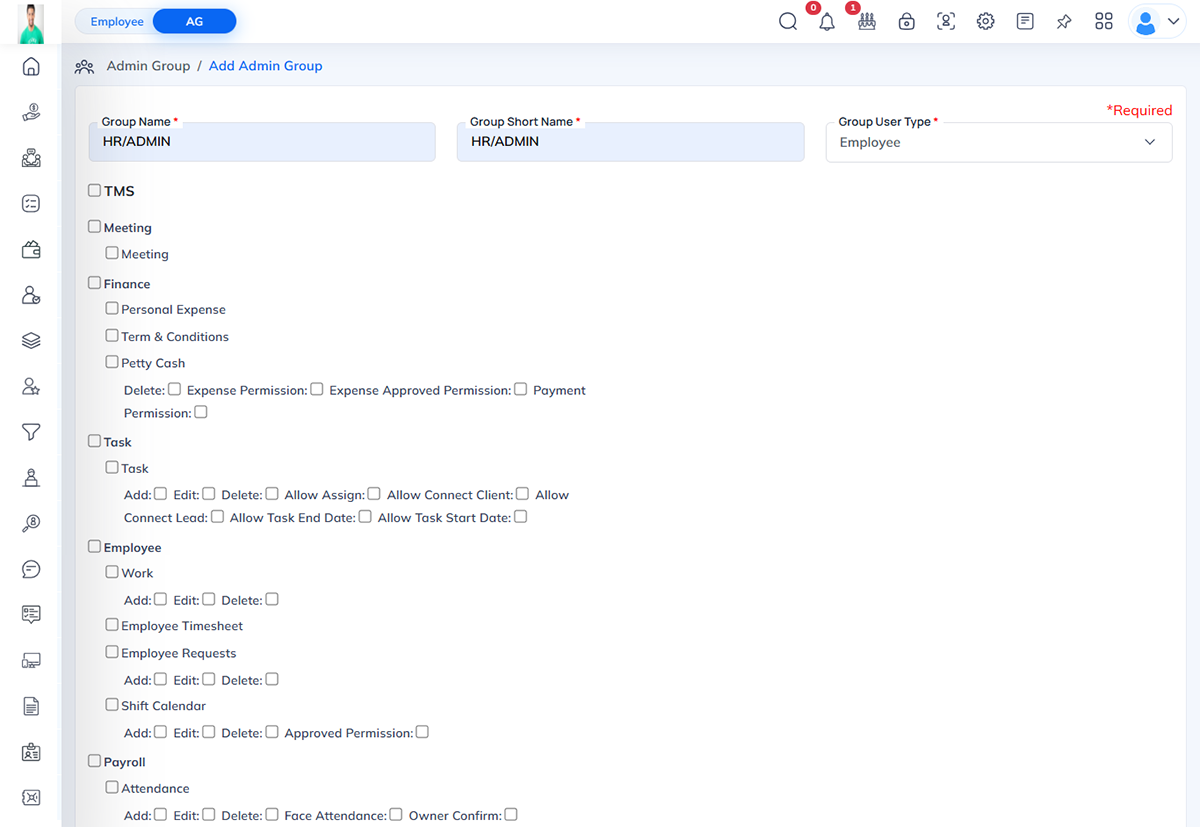
After entering the basic group details, you can configure permissions for different modules. Each module has specific options like Add, Edit, Delete, Approve, or Assign depending on its purpose.
Below is a list of available modules and permissions:
- Enable or disable access to meeting management and time tracking features.
- Personal Expense
- Terms & Conditions
- Petty Cash
- Add / Edit / Delete
- Expense Approval Permission
- Payment Permission
- Task
- Add / Edit / Delete
- Assign / Connect Client / Connect Lead
- Set Start / End Date Permissions
- Work: Add, Edit, Delete.
- Employee Timesheet
- Employee Requests: Add, Edit, Delete.
- Shift Calendar: Add, Edit, Delete, Approved Permission.
- Attendance: Add, Edit, Delete, Face Attendance and Owner Confirmation.
- Salary Report
- Leave Request / Overtime Request / Leave Grant: Add, Edit, Delete.
- Project: Add, Edit, Delete, Extra Details and Phase Details.
- Test Case / Project Section / Project Sub Section: Add, Edit, Delete.
- Support / Helpdesk: Add, Edit, Delete, Allow Assign.
- Manage client details — Add, Edit, Delete.
- Lead / Deal / Prospects: Add, Edit, Delete.
- Call Log
- Asset Requests: Add, Edit and Delete, Extra Details.
- Manage employee performance goals — Add, Edit, Delete.
- Petty Cash Report
- Task Pivot Report
- Candidate Interview Report
- Employee Activity Report
- Attendance Reports
- Client & Project Reports
- Employee Details
- Test Case History
- Sales Return
- Task Hour
- Save: Save the group and its permissions.
- Back: Return to the Group List without saving changes.
- Ensure Group User Type is selected before saving — it's a mandatory field.
- Avoid duplicating group names to prevent confusion.
- Admin groups should have broader access permissions, while Employee groups should be restricted based on role.
- Permissions can be modified anytime by editing the group.
User module allows system admin to create users who can use semsto. It includes functionalities such as viewing users, adding new users, editing user details, changing passwords and assigning roles and permissions.
Overview
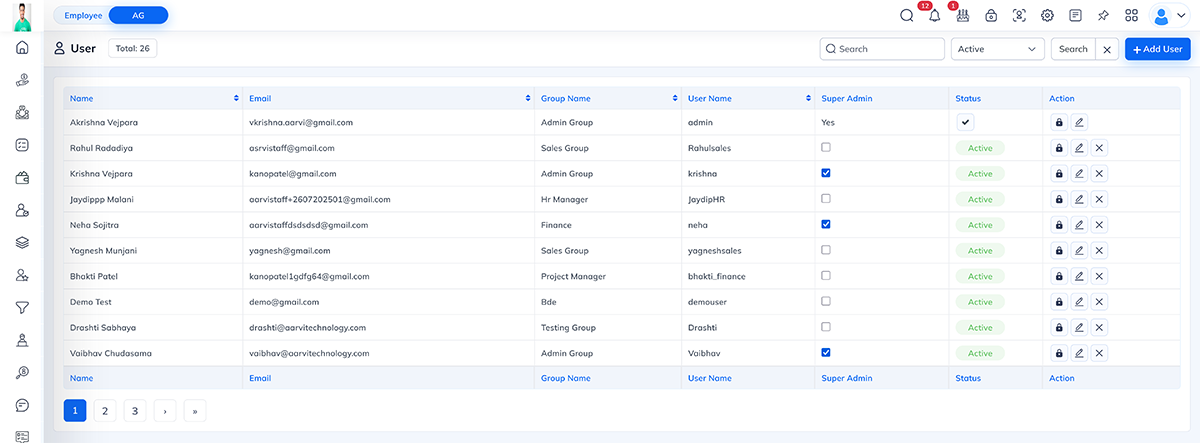
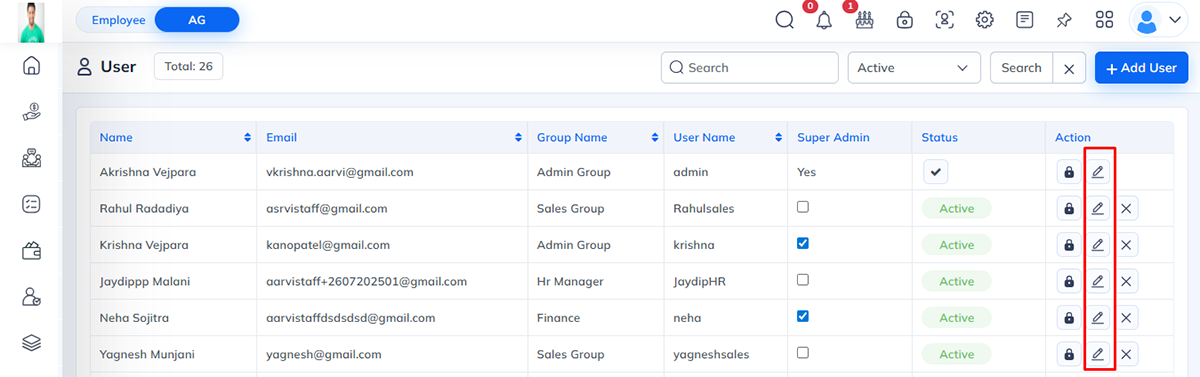
The User List displays all users in the system along with their details. You can perform actions such as editing user details, changing passwords, or deleting a user.
- Search Bar: Search users by name, email, or username.
- Filter: Filter users based on status (Active/Inactive).
- Pagination: Navigate through multiple pages if users exceed the page limit.
- Add User: Click + Add User to create a new user.
- Name: Full name of the user.
- Email: User’s email address.
- Group Name: Role or group assigned (e.g., Admin Group, Sales Group)..
- User Name: Login username.
- Super Admin: Indicates if the user has Super Admin privileges (Yes/No).
- Status: Active or inactive user.
- Actions:
- Lock Icon: Change user password.
- Edit Icon: Edit user details.
- Delete Icon: Remove user from the system.
To add a new user:
- Click + Add User.
- Fill in the required details
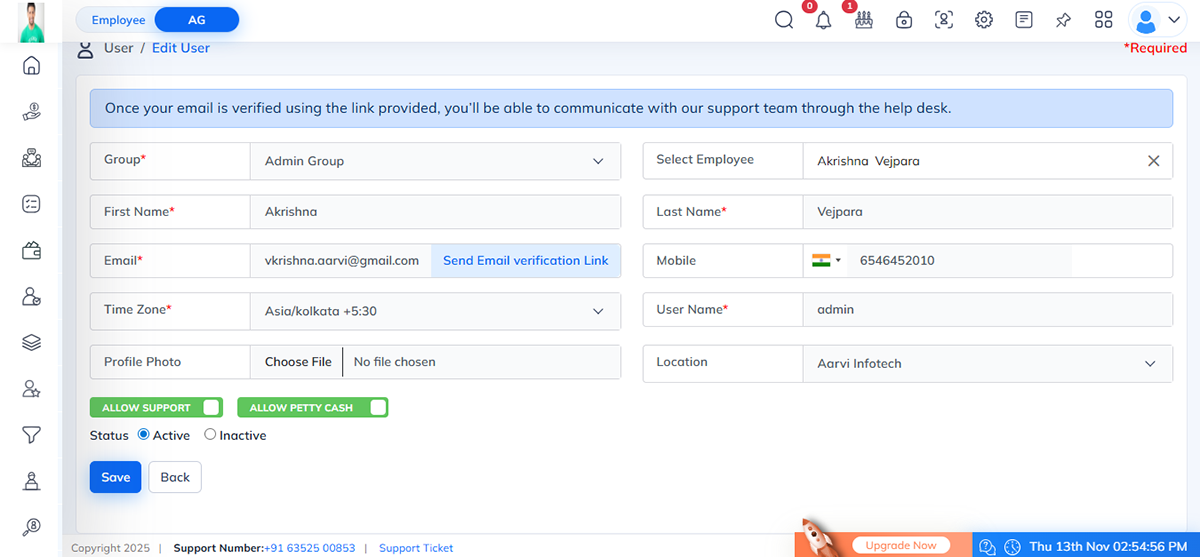
Field Description Group Select a group for the user. This is important to select because based on this all permission granted to user. Select Employee Search and select an existing employee or manually enter name. This is required if have to connect any existing employee to user. First Name Enter the first name of the user. Last Name Enter the last name of the user. Email Enter a valid email address. Mobile Enter user’s mobile number. Time Zone Select the appropriate time zone. Based on user’s location assign proper timezone. User Name Assign a unique username for login. Location Select user location (optional). Profile Photo Upload a profile image (optional). New Password Set a password for the user. A strong password indicator will display. Confirm Password Confirm the password. Allow Support Enable this if you have to allow access to support tickets to users. Allow Petty Cash Enable this if you have to allow access to petty cash to users. Status Select Active or Inactive. - Click Save to add the user, or Back to return to the user list without saving.

- Click the Edit Icon on the user list.
- Update necessary details:
- Group, Name, Email, Mobile, Time Zone, Username, Location, Profile Photo, Permissions (Support/Petty Cash) and Status.
- Email Verification: Click Send Email Verification Link if the email needs verification.
- Click Save to apply changes or Back to cancel.
- Click the Lock icon under the Action column.
- Enter the New Password and Confirm Password
- Click Save to update the password or Close to cancel.

- Super Admin: Users marked as Super Admin have full access to all system modules and settings.
- Active/Inactive Status: Control whether the user can log in or access the system.

- Allow Support: Enable the user to respond to support tickets.
- Allow Petty Cash: Enable the user to manage petty cash transactions.
- Ensure that the email address provided is valid to allow proper communication and email verification.
- Always confirm that passwords match when creating or updating a user.
- Users must belong to a group for correct permission assignment.