IP Address Based Restriction
This module will explain how to restrict employee login for specific IP Address Only.This
functionality will work only when proper configuration is setup. Before enabling IP restriction, make sure all
required settings are correctly configured in the system.
Configuration Setup
Configuration#1: IP Restriction Configuration
This option is used to control who can log in to the system based on IP addresses.
If you select Yes, the system allows login only from the IP addresses added in the Trusted IP List. If you
select No, anyone can log in from any network as long as they have valid credentials.
Use this option when you want to restrict access only to office networks or
trusted network locations for better security.
If Do You Need IP Restriction For Login? is
set to Yes, then the IP restriction feature will become active. This
means that only the IP addresses configured in the system will be allowed to access the account. Any user
trying to log in from an unregistered or unauthorized IP will be blocked.
To enable this functionality, proper
configuration is required in the Security & Visibility Settings.
How to Set Up IP Restriction
- Go to Configuration in the main menu.
- Open Security & Visibility Settings.
- Locate the option Do You Need IP Restriction For Login?
- Select Yes to activate IP-based login control.
- After enabling it, add the allowed IP addresses in the IP Master section.
- Only users accessing the system from these approved IPs will be permitted to log in.
Configuration #2: Trusted IP List (Allow Access to Employee only from Fixed IP
Addresses)
Many companies have Static IP addresses which are used to allow employees to
access. So if a company wants to restrict login only through a specific fixed IP address then they can do it
though below setting.
Setting Configuration → Employee Setting ( In left Navigation) →
Security & Visibility Setting → Trusted Ip List.
This is a free text in which you can enter multiple IP address comma separated eg.
192.168.1.10, 203.0.113.5, so in this case
all employees are able to login only through this IP address only.
This configuration is also dependent on IP Restriction configuration and will work
only if IP Restriction configuration is setup as Yes. System will check every login request and allow login
only if the IP matched with the list entered here.
You can enter IP address by comma seperation
Example: 192.168.1.10, 203.0.113.5,
10.0.0.25
How the System Works
- If IP Restriction is Yes, the system reads the Trusted IP List.
- Only users connecting from the listed IPs can log in successfully.
- If a user tries to log in from any other IP, access is denied for security protection.
- If IP Restriction is No, the Trusted IP List is ignored.
Use Case Example
Your office internet IP is 103.25.30.11
Your home IP is 49.36.55.120
If you want to allow login only from office, you will keep only 103.25.30.11 in
the list and set IP Restriction to Yes.
If you want both office and home login, add both IPs separated by a comma.
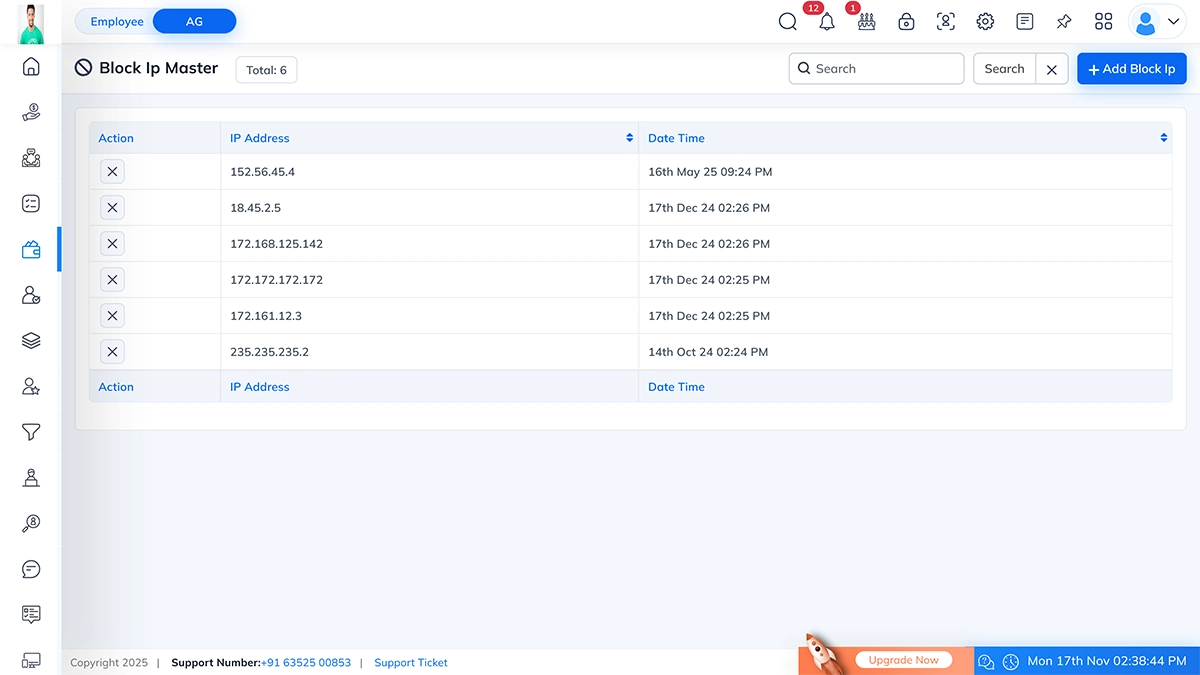
Block IP
Restrict Access to Employee through any specific IP Addresses
The Block IP Master module allows the admin to block
specific IP addresses from accessing the system. This helps improve security by preventing unauthorized or
suspicious access.
How to Open: Go to Settings → Block
IP Master → Click on “Open” to access the block IP master page.
Block IP Master Overview
This page displays a complete list of all blocked IP addresses along with the
date and time when each entry was added.
Page Sections
| Section |
Description |
| Action |
Allows admin to delete a blocked IP. |
| IP Address |
Shows the IP address that has been blocked. |
| Date Time |
Shows when the IP was added to the block list. |
| Search Bar |
Search any IP from the list. |
| Add Block IP |
Button to add a new IP address to the blocked list. |
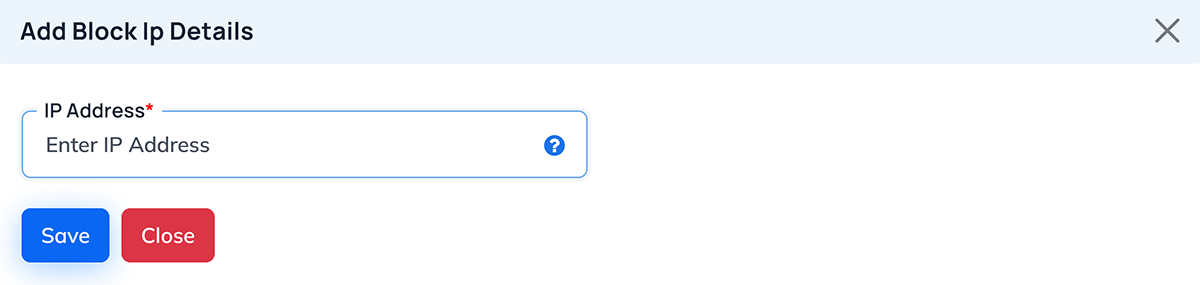
Add Block IP
When you click Add Block IP, a popup window appears where you can add a new IP address.
Add Block IP Popup Fields
| Field Name |
Description |
| IP Address (Required) |
Enter the valid IP address to block. |
Buttons
| Button |
Function |
| Save |
Save and add IP address to the block list. |
| Close |
Closes the popup without saving. |
How to Add a Blocked IP
Follow the steps below:
- Click the Add Block IP button on the top right.
- A popup form will open.
- Enter a valid IP Address inside the input field.
- Click on Save.
- The IP will be added to the master list with the current date and time.
How to Delete a Blocked IP
If you want to remove an IP from the block list:
- Go to the Action column.
- Click the X (Delete) icon next to the IP.
- Confirm deletion.
- The selected IP will be removed from the block list.
Important Notes
- Only Admin level users can add or remove blocked IPs.
- If an IP is blocked, the user trying to log in from that IP will be denied access.
- Always verify an IP before blocking to avoid restricting valid users.
- This applied to mobile, web and desktop applications.
Use Cases
| Scenario |
Example |
| Suspicious Login Attempts |
Block the attacker’s IP. |
| Brute Force Attack |
Prevent repeated failed login attempts. |
| Office-only Login Rule |
Allow only office IPs and block all others. |
Block IP for Employee
Overview
The Block Employee IP module in Semsto is designed to manage and control employee access to
the system based on authorized IP addresses. It ensures secure login activity by restricting employee access
only from registered or company-approved networks.
This feature helps organizations enhance security, prevent unauthorized remote logins and
maintain compliance with internal IT and HR policies.
Purpose
The Block Employee IP Module helps to:
- Restrict employee login access to specific IP addresses.
- Improve organizational data security.
- Prevent unauthorized access from external or public networks.
- Manage IP-based attendance or activity tracking.
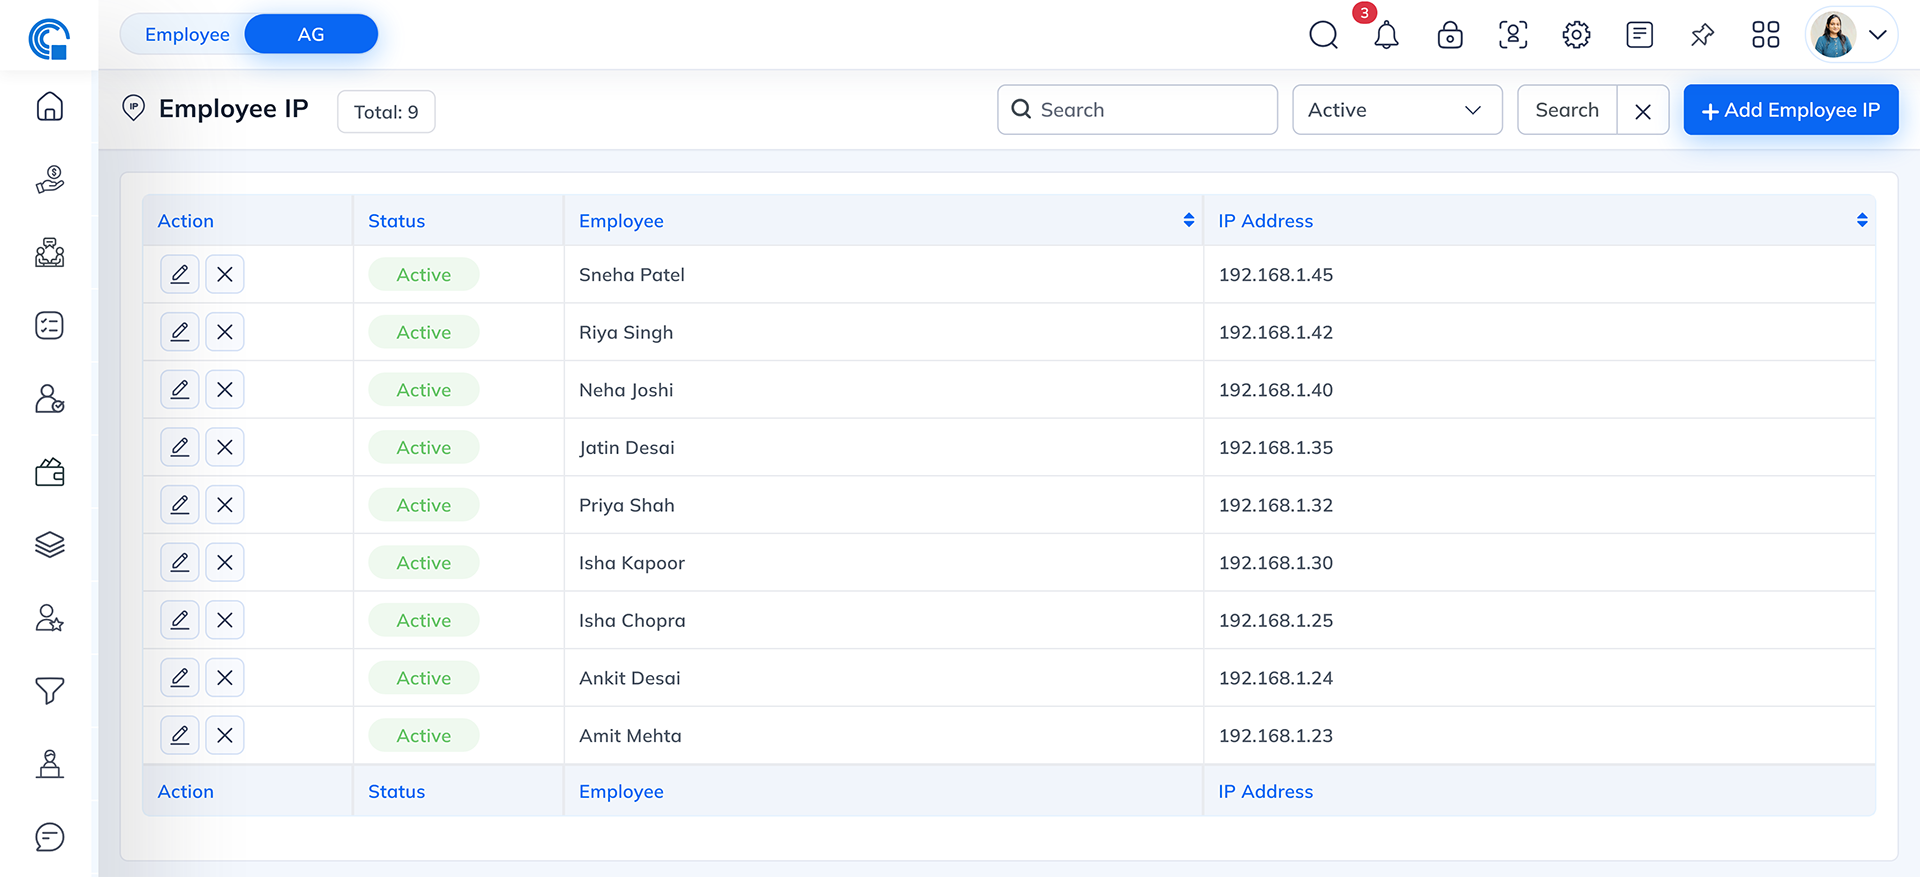
Block Employee IP List Page
The Block Employee IP page displays all
assigned employee IPs in a structured format for easy management.
Field Description
| Field Name |
Description |
| Action |
Allows users to Edit or Delete an IP record. |
| Status |
Displays the current status of the IP (Active or Inactive). |
| Employee |
Shows the name of the employee associated with the IP address. |
| IP Address |
Displays the registered IP address assigned to the employee. |
Other Functionalities
- Search Bar: Allows searching for employees or IP addresses.
- Status Filter: Filter records by Active or Inactive status.
- Add Employee IP: Opens the popup form to add a new IP address
for an employee.
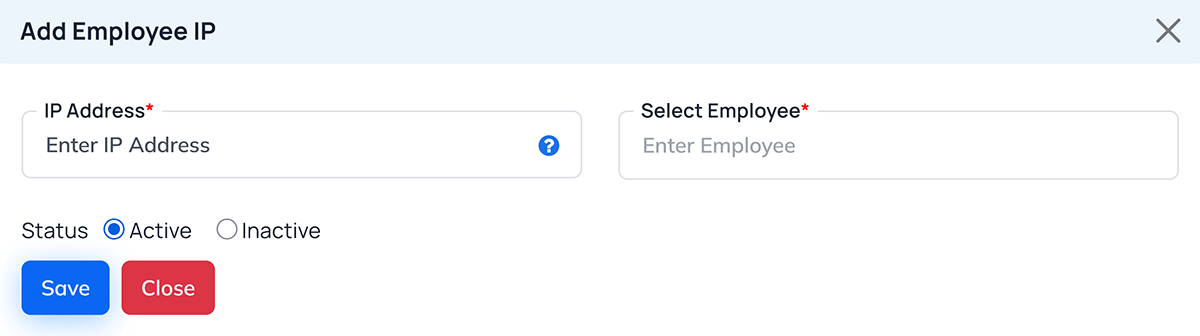
Add Employee IP Page
The Add Employee IP form allows
administrators to assign or manage employee-specific IP restrictions.
Field Description
| Field Name |
Description |
| IP Address |
Enter the authorized IP address for the employee (Mandatory field). Example: 152.59.17.119. YOu
can add more then 1 IP address by separate it by comma. |
| Select Employee |
Select the employee from the list to assign this IP address (Mandatory field). |
| Status |
Choose whether the IP is Active (currently in use) or
Inactive (temporarily disabled). |
Buttons
- Save: Saves the IP restriction data for the selected
employee.
- Close: Closes the form without saving.
How It Works
- The HR or admin assigns one or more IP addresses to an employee.
- The system verifies the employee's login attempts against the assigned IP addresses.
- If the IP does not match, access is denied with a restriction message.
- Only active IPs are accepted for login validation.
How to Add a New Employee IP
- Navigate to Settings → Employee IP Restriction.
- Click the + Add Employee IP button.
- Enter the following details:
- IP Address: The employee's authorized IP (e.g.,
49.36.91.251).
- Select Employee: Choose the employee from the dropdown
list.
- Status: Set to Active if the IP should be immediately enabled.
- Click Save to apply the restriction.
How to Edit or Delete an Employee IP
- Edit: Click the pencil icon to modify the existing IP or
change its status.
- Delete: Click the trash icon to permanently remove the IP
address.
(Note: Deleting an IP immediately removes login access for that IP.)
Use Case Example
Scenario: An employee, Kuldeep Patel, is
allowed to access the system only from the office network.
- Assigned IP: 152.59.17.119
- Status: Active
If the employee attempts to log in from any other IP, the system will block access
and prompt a security warning.
Benefits
- Enhances login security.
- Restricts access to known, authorized networks.
- Prevents data leaks or unauthorized remote work.
- Supports compliance with organizational cybersecurity policies.
Example Records
| Employee |
IP Address |
Status |
| Krishna Vejpara |
152.59.17.119 |
Active |
| Krishna Vejpara |
49.36.91.251 |
Active |