Google Calendar Connectivity
Meeting Google Calendar Connectivity
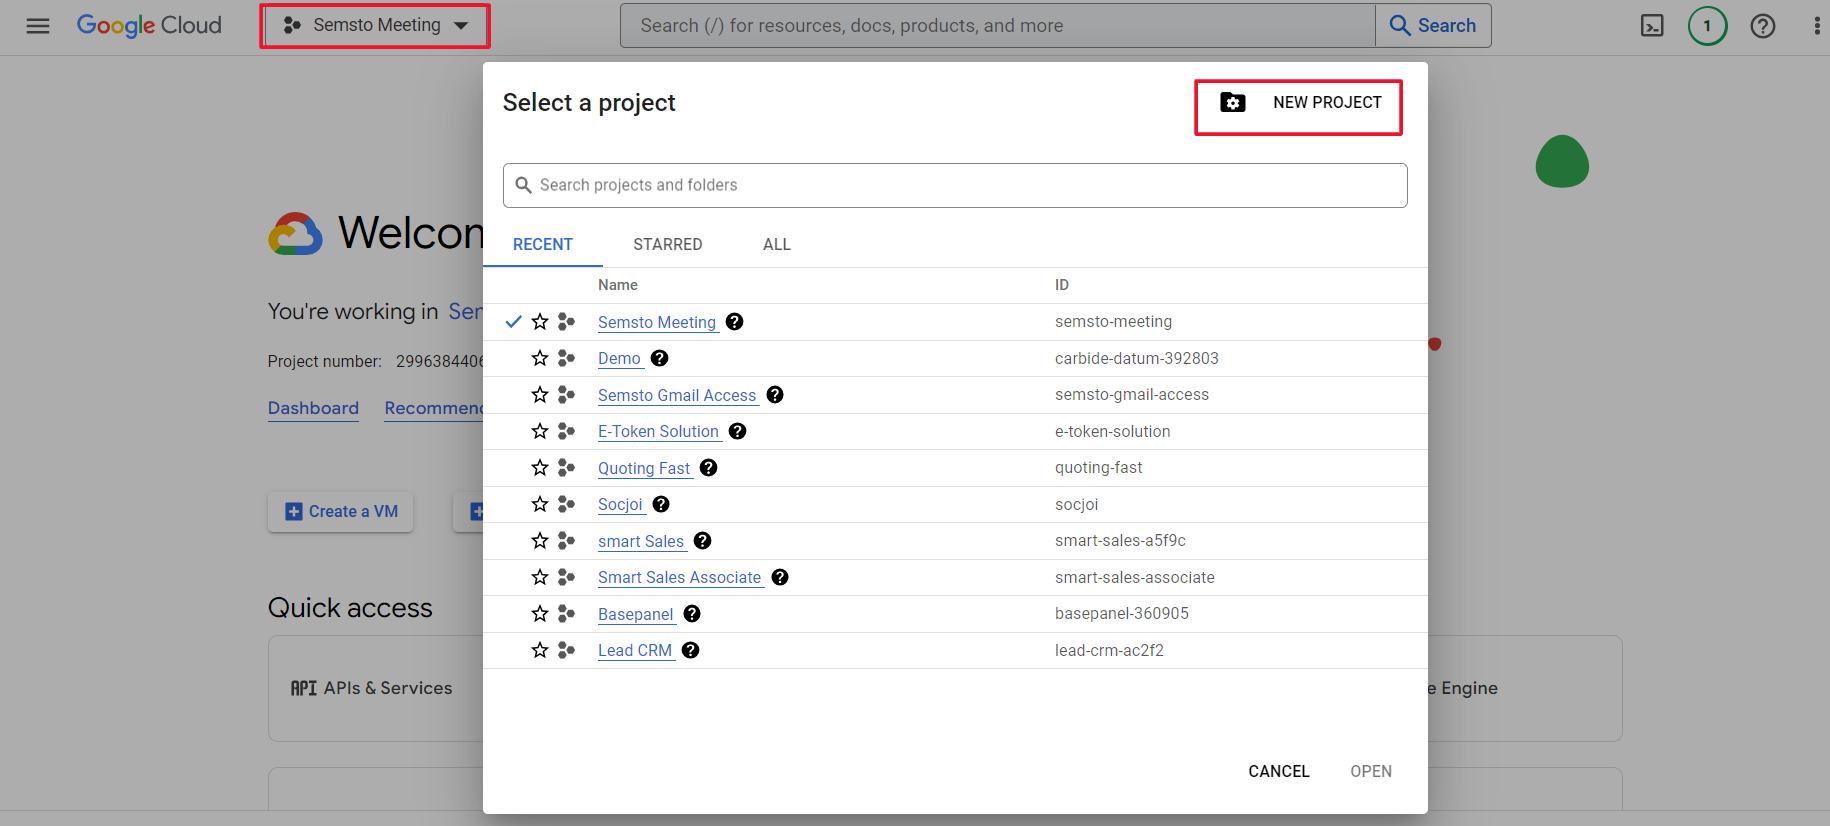
First you need to create project in google console
https://console.cloud.google.com/welcomeClick New project
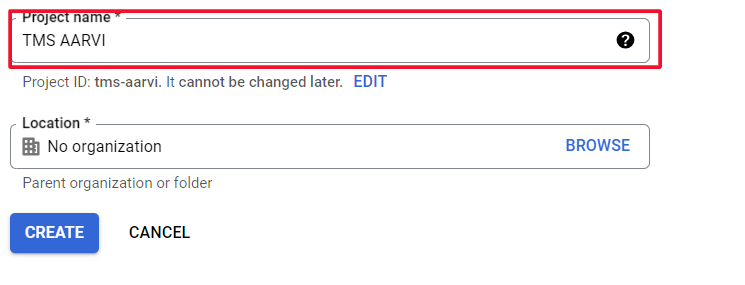
Fill project name and click create button
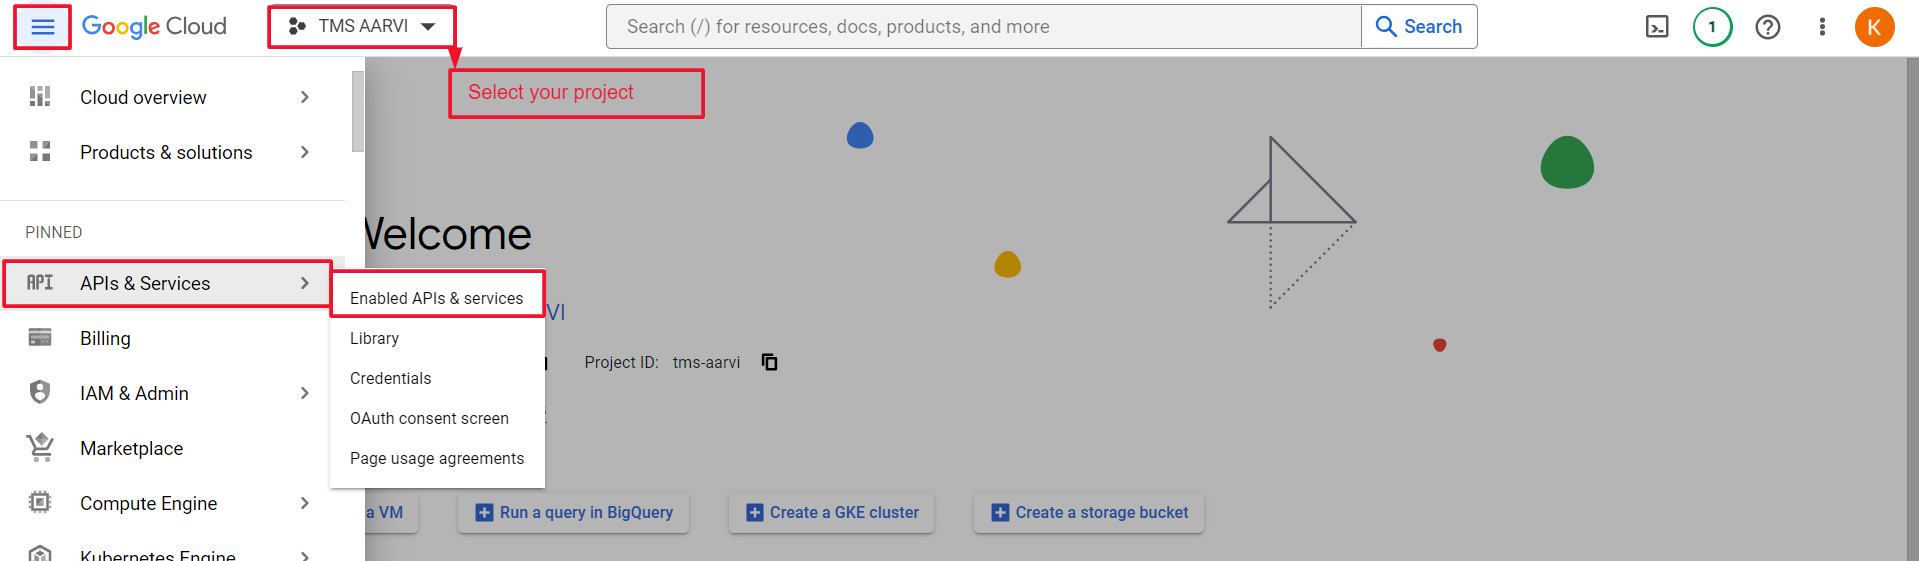
Then select you project and click navigation menu on left top
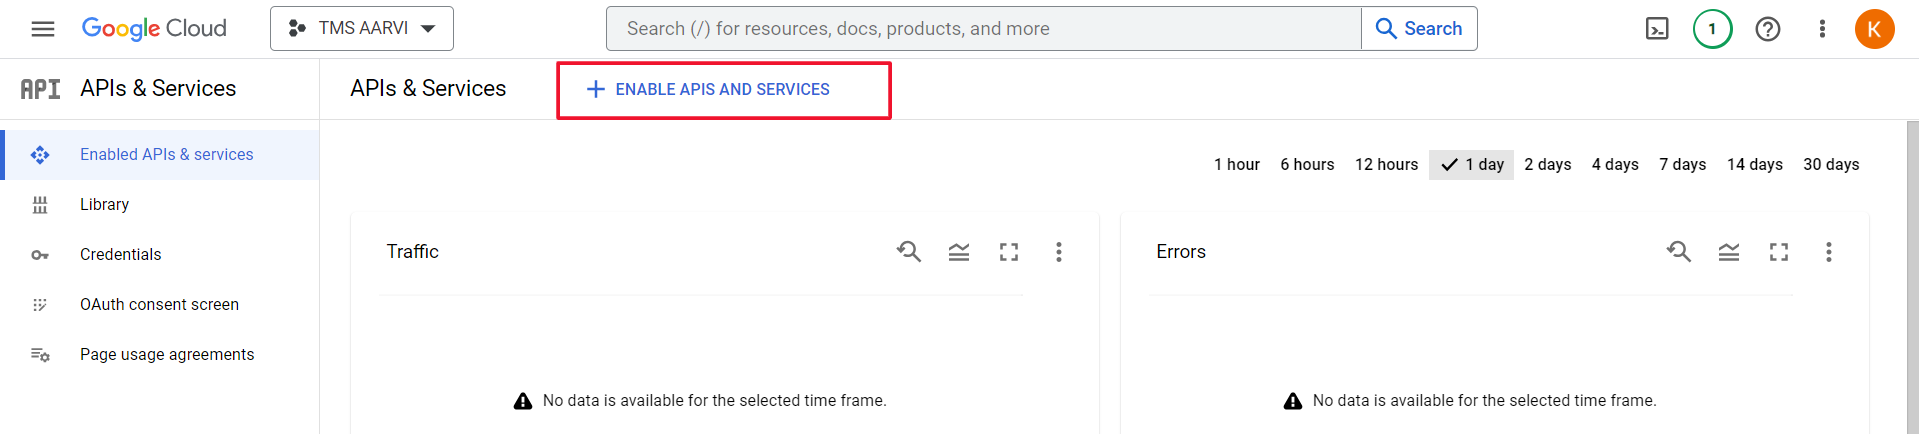
Click APIs & Services > Enabled Apis & Services
Click Enable Apis and services button
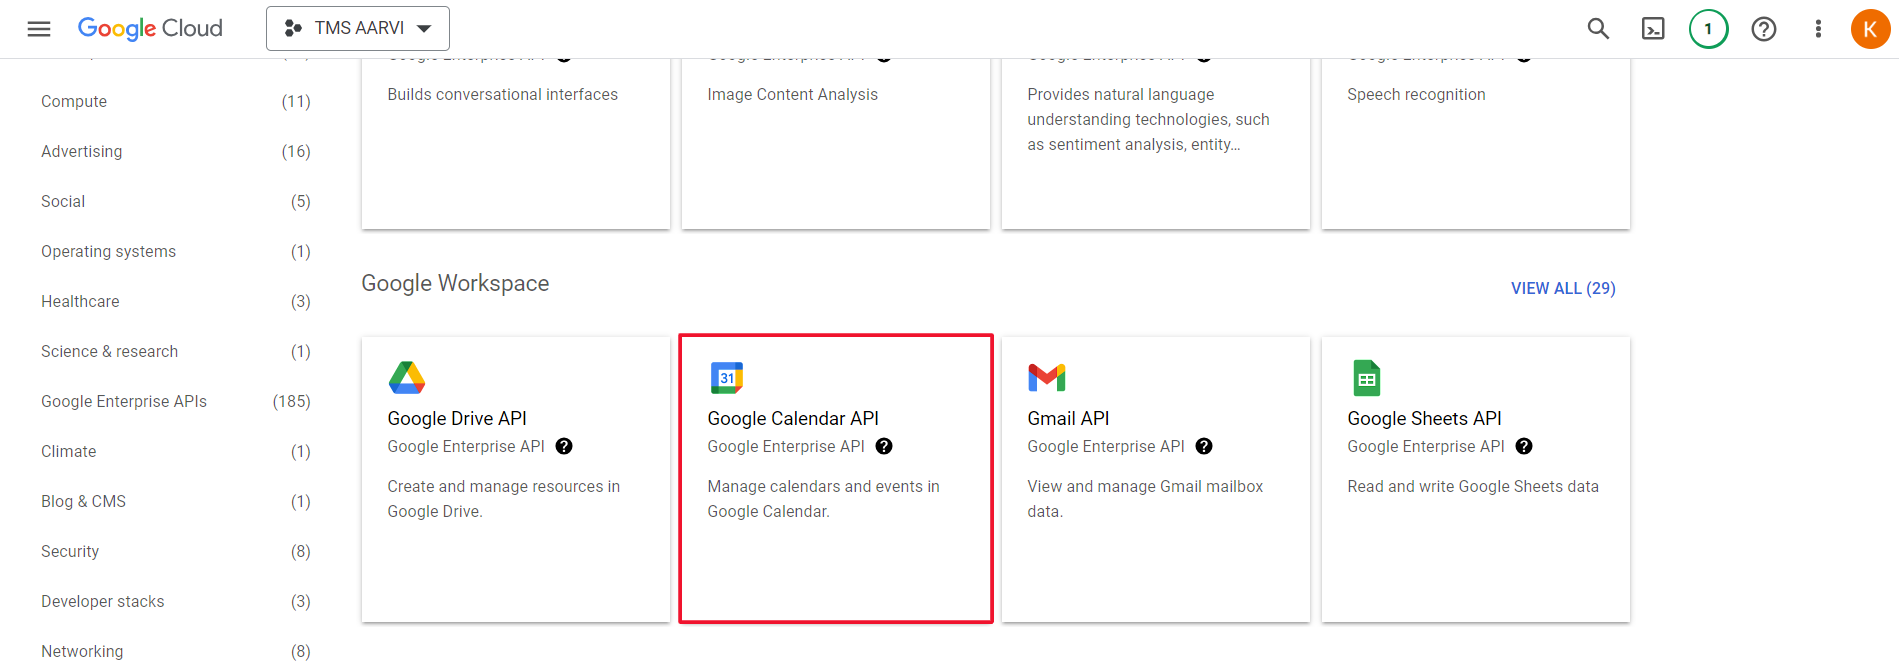
Click Google Calendar Api
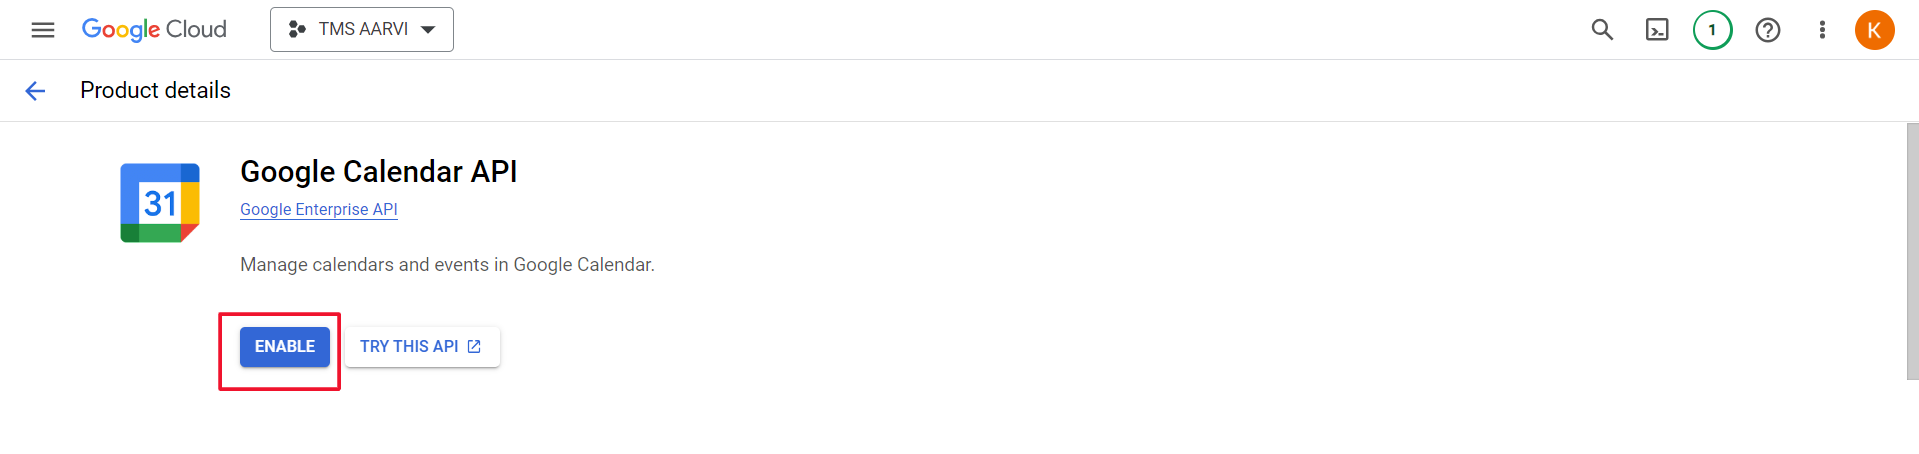
Click Enable button
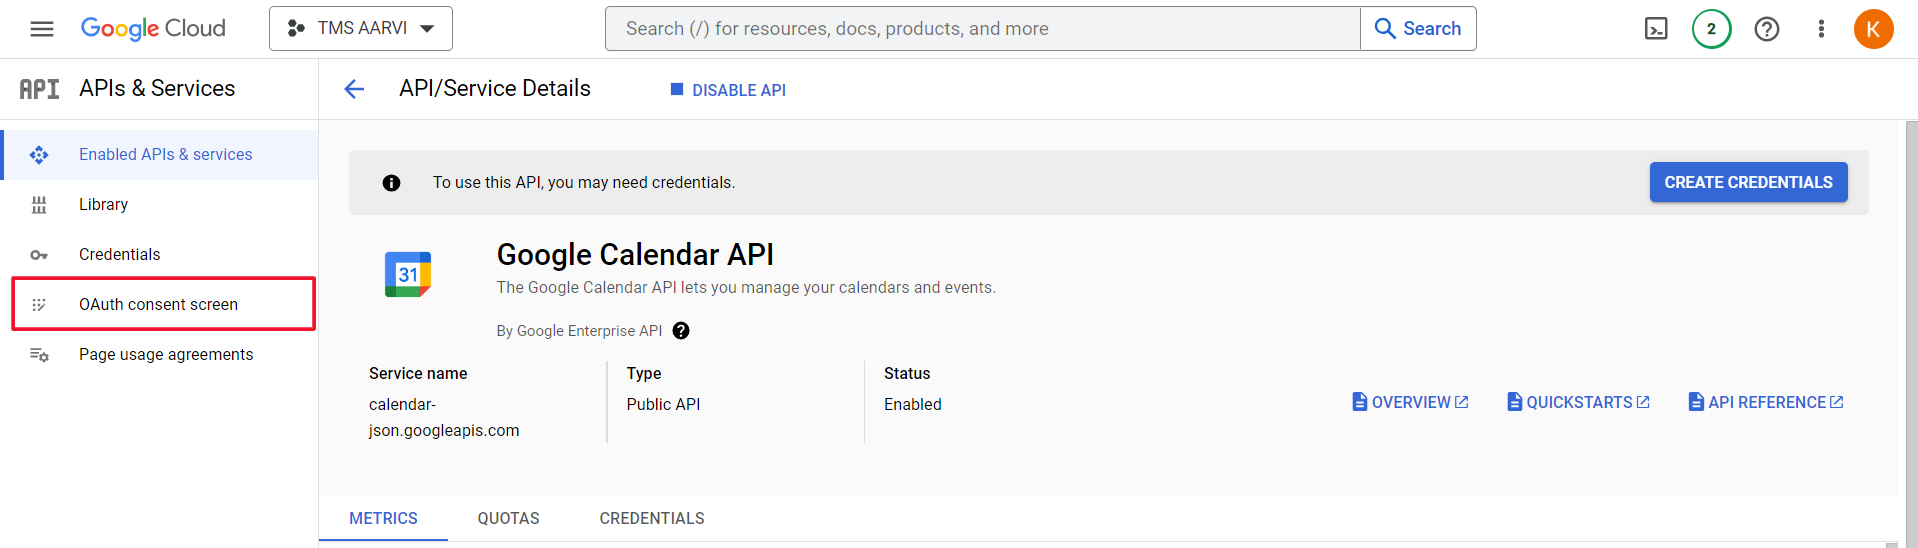
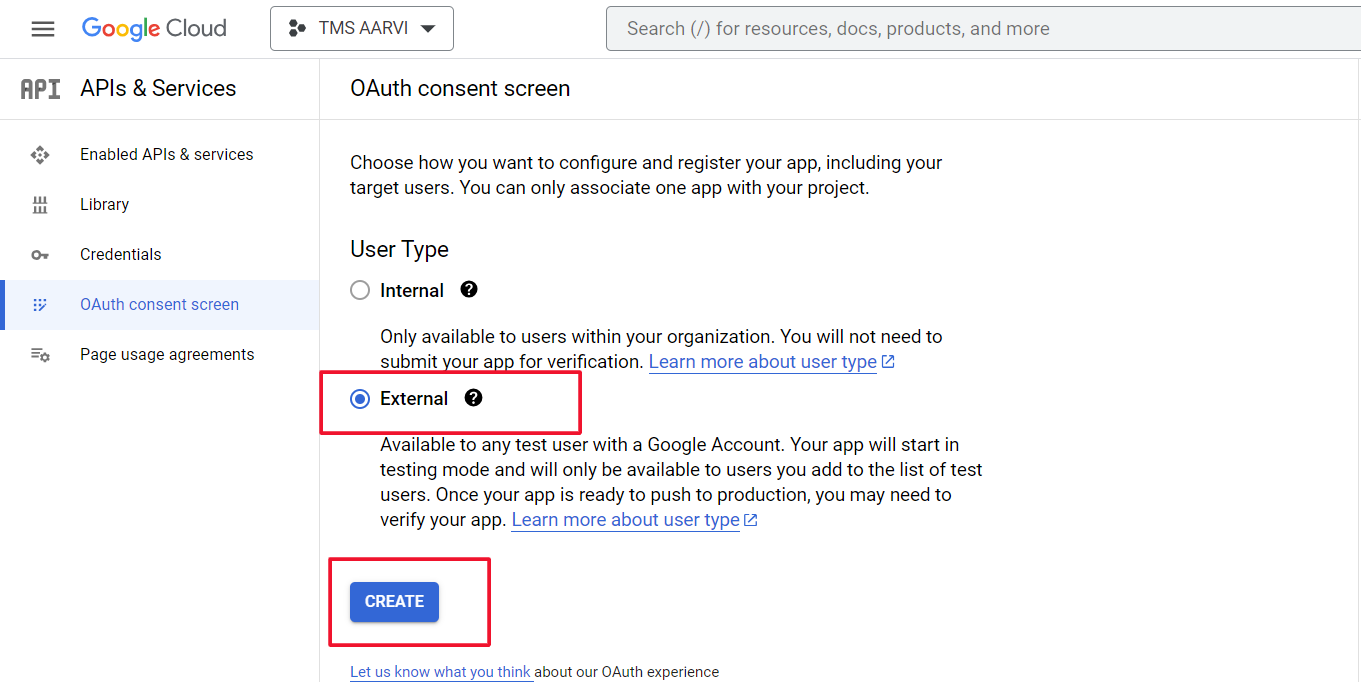
Click Oath Content Screen
Select External and then click Create button
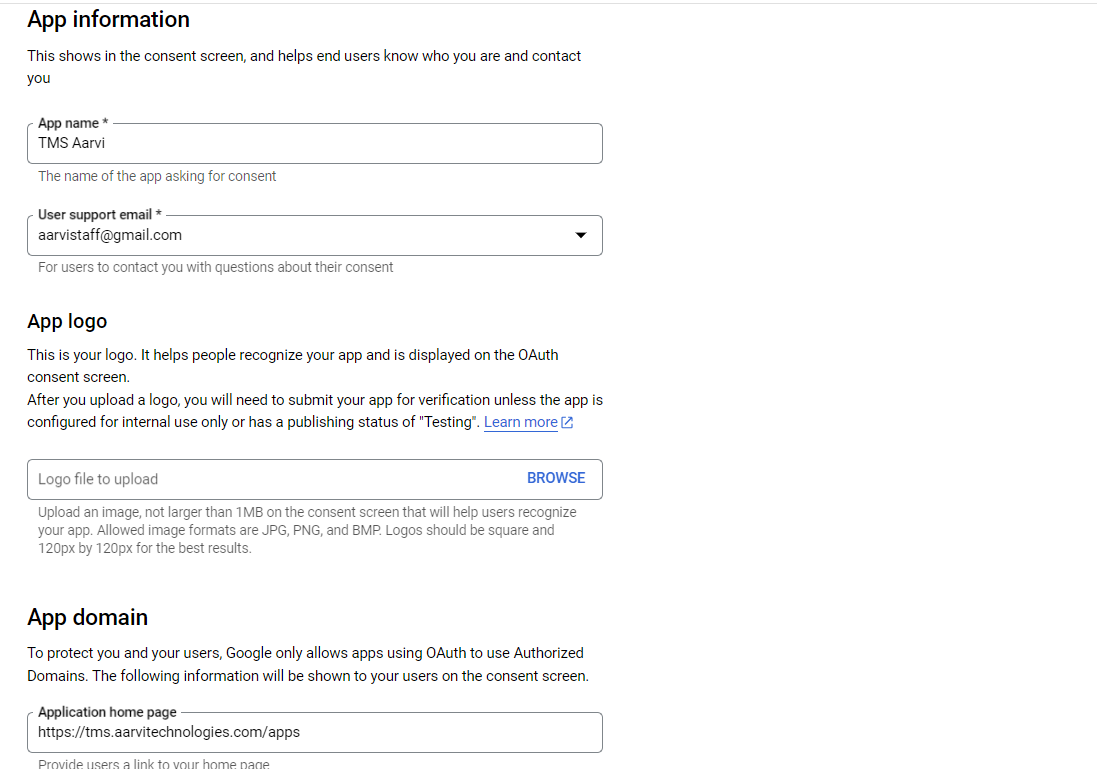
Fill Application basic detail
In Authorized domain fill semsto.com
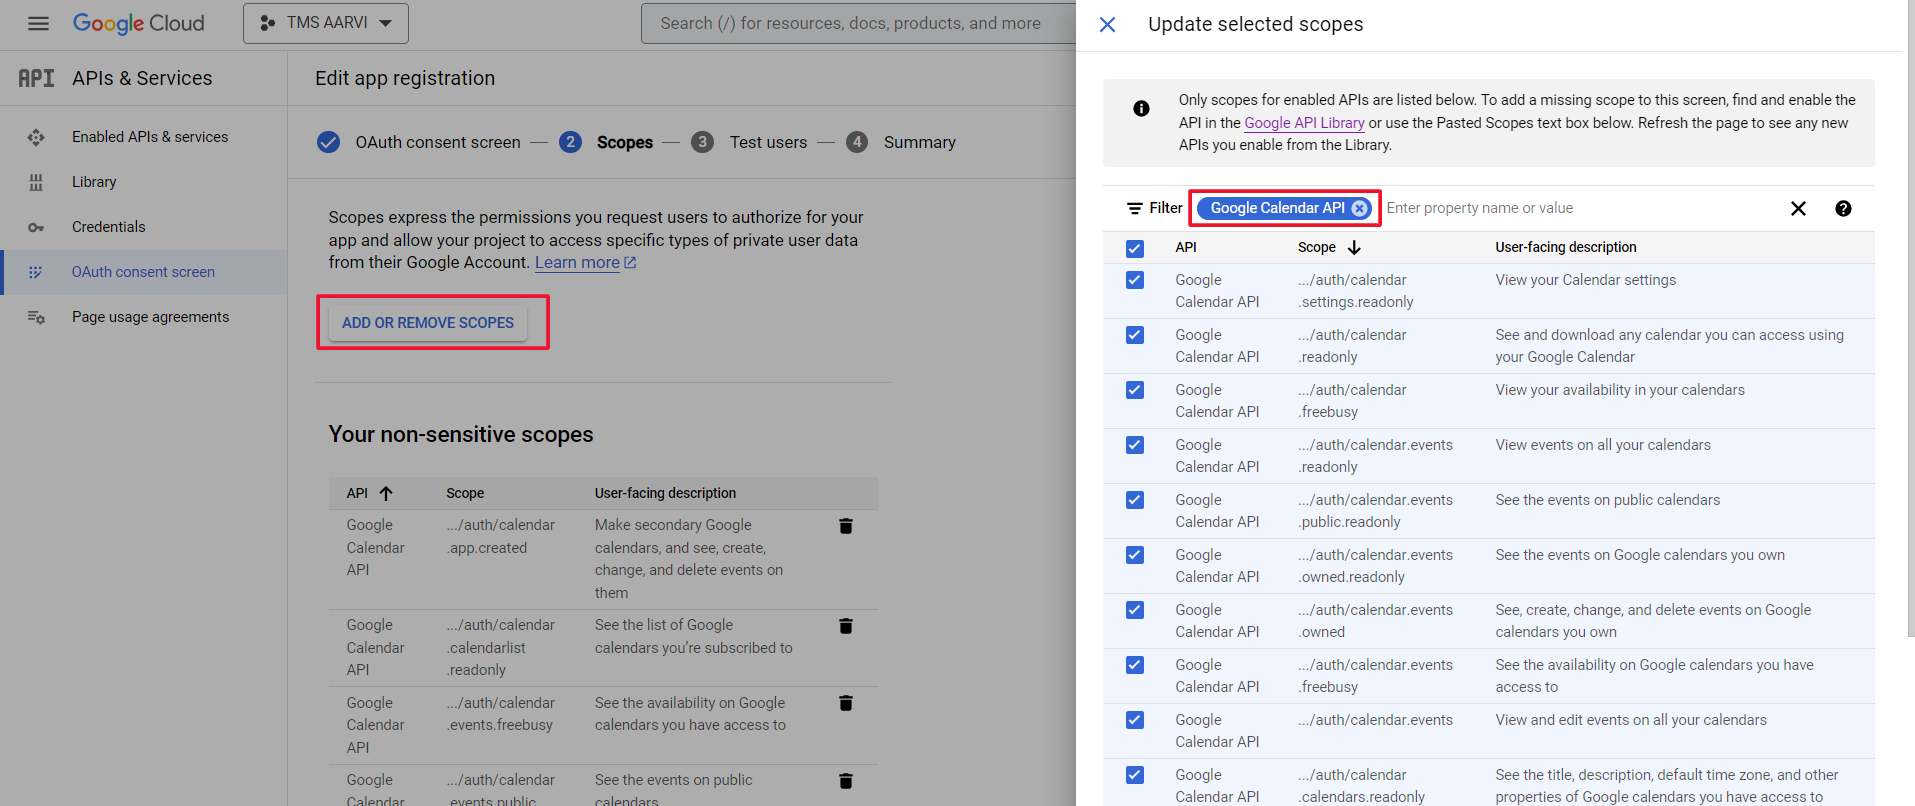
In scope select all calendar related scope (filter Google Calender Api in search box)
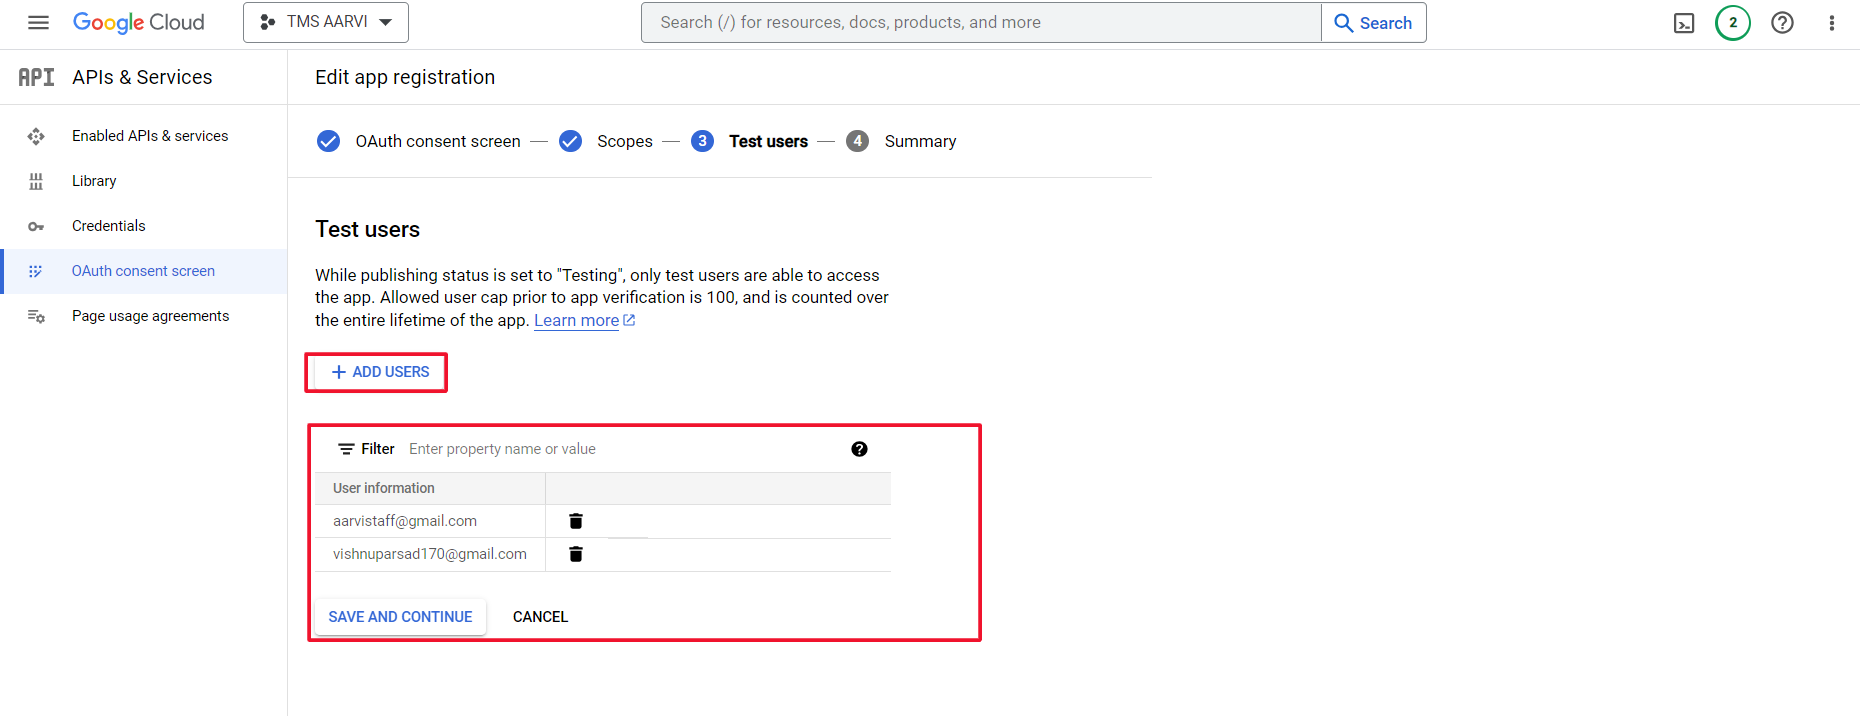
Next screen will be Test user
Here you can add testing user
Next screen is summary screen where you can see application detail
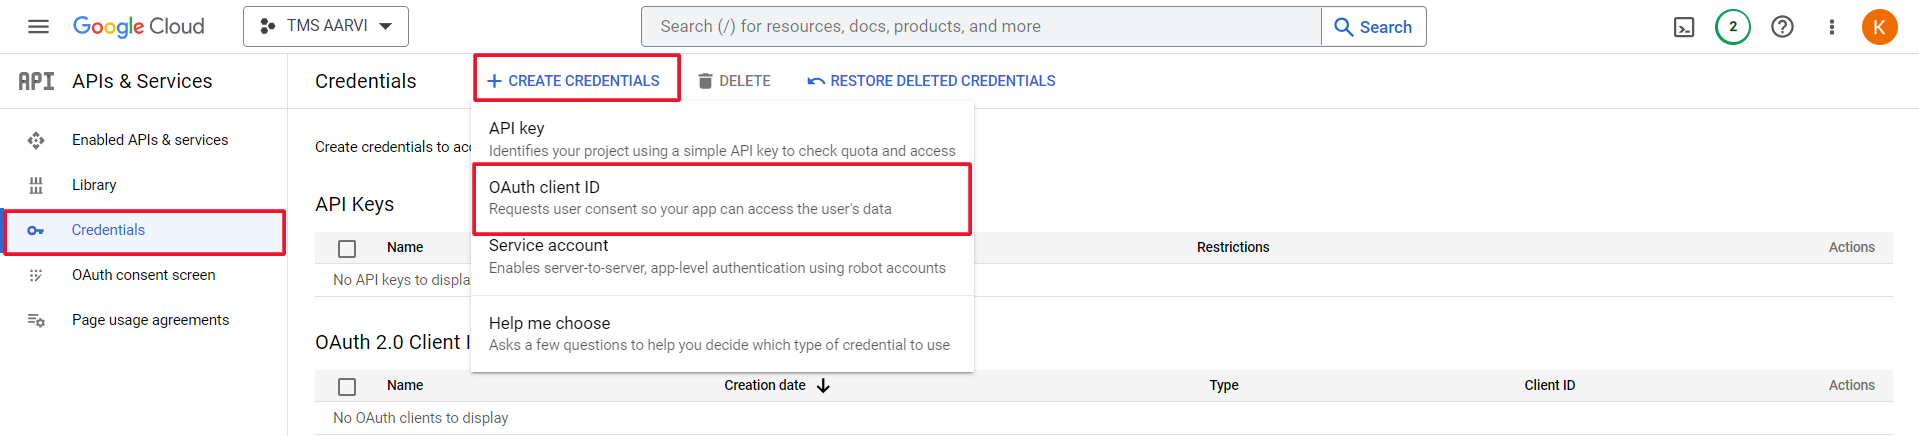
Next you need to create OAuth Client ID
Click Credentials and then click Create Credential and select OAuth Client ID
Select Application type: Web Application
Authorised Redirect Url add below (domain link + meeting_callback.php)
https://app.semsto.com/meeting_callback.phpIf you have subdomain also the add your subdomain link also
https://yourdomain.semsto.com/meeting_callback.php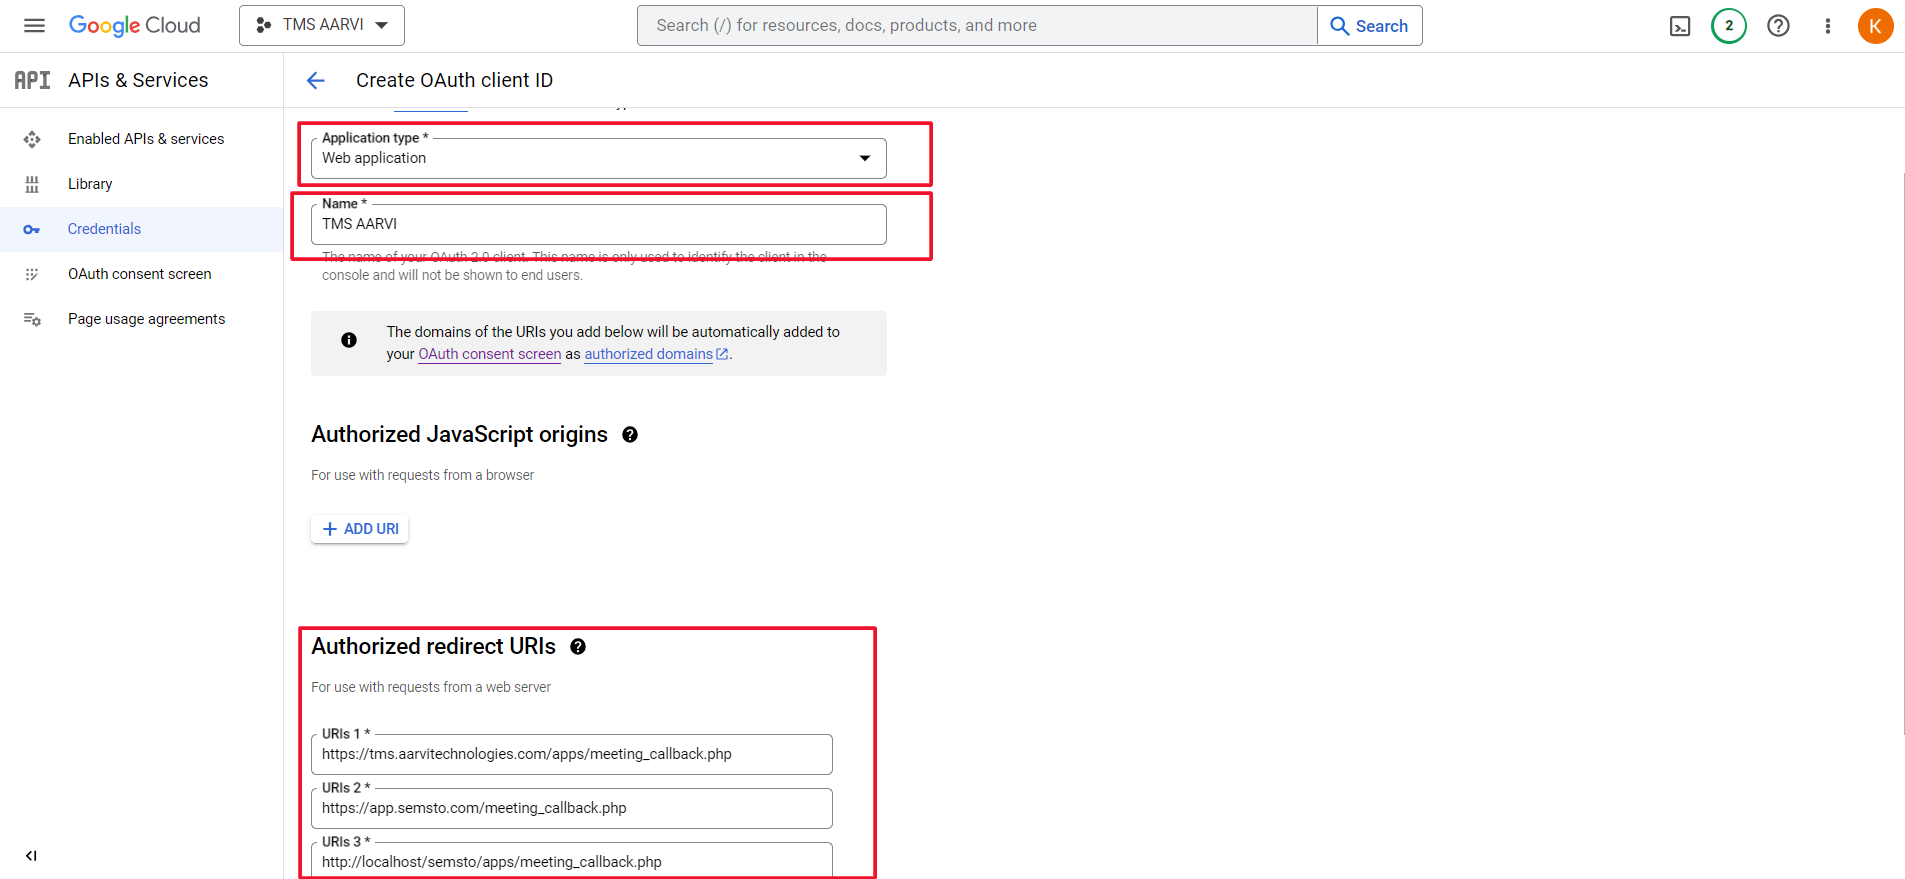
After Save you need to download JSON file
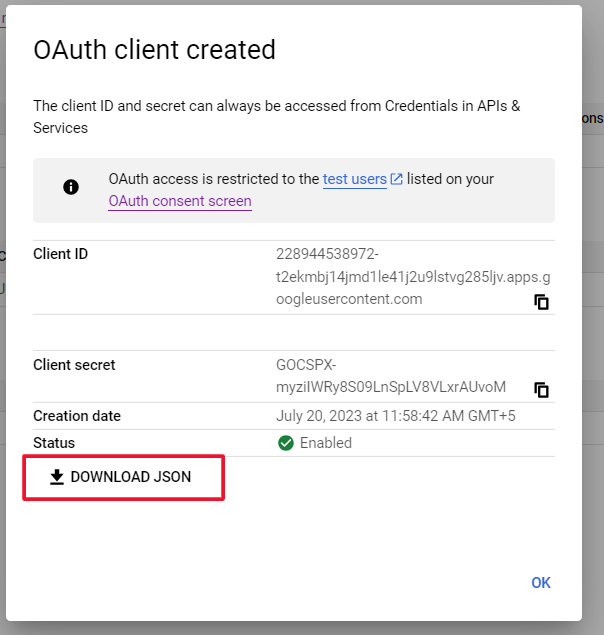
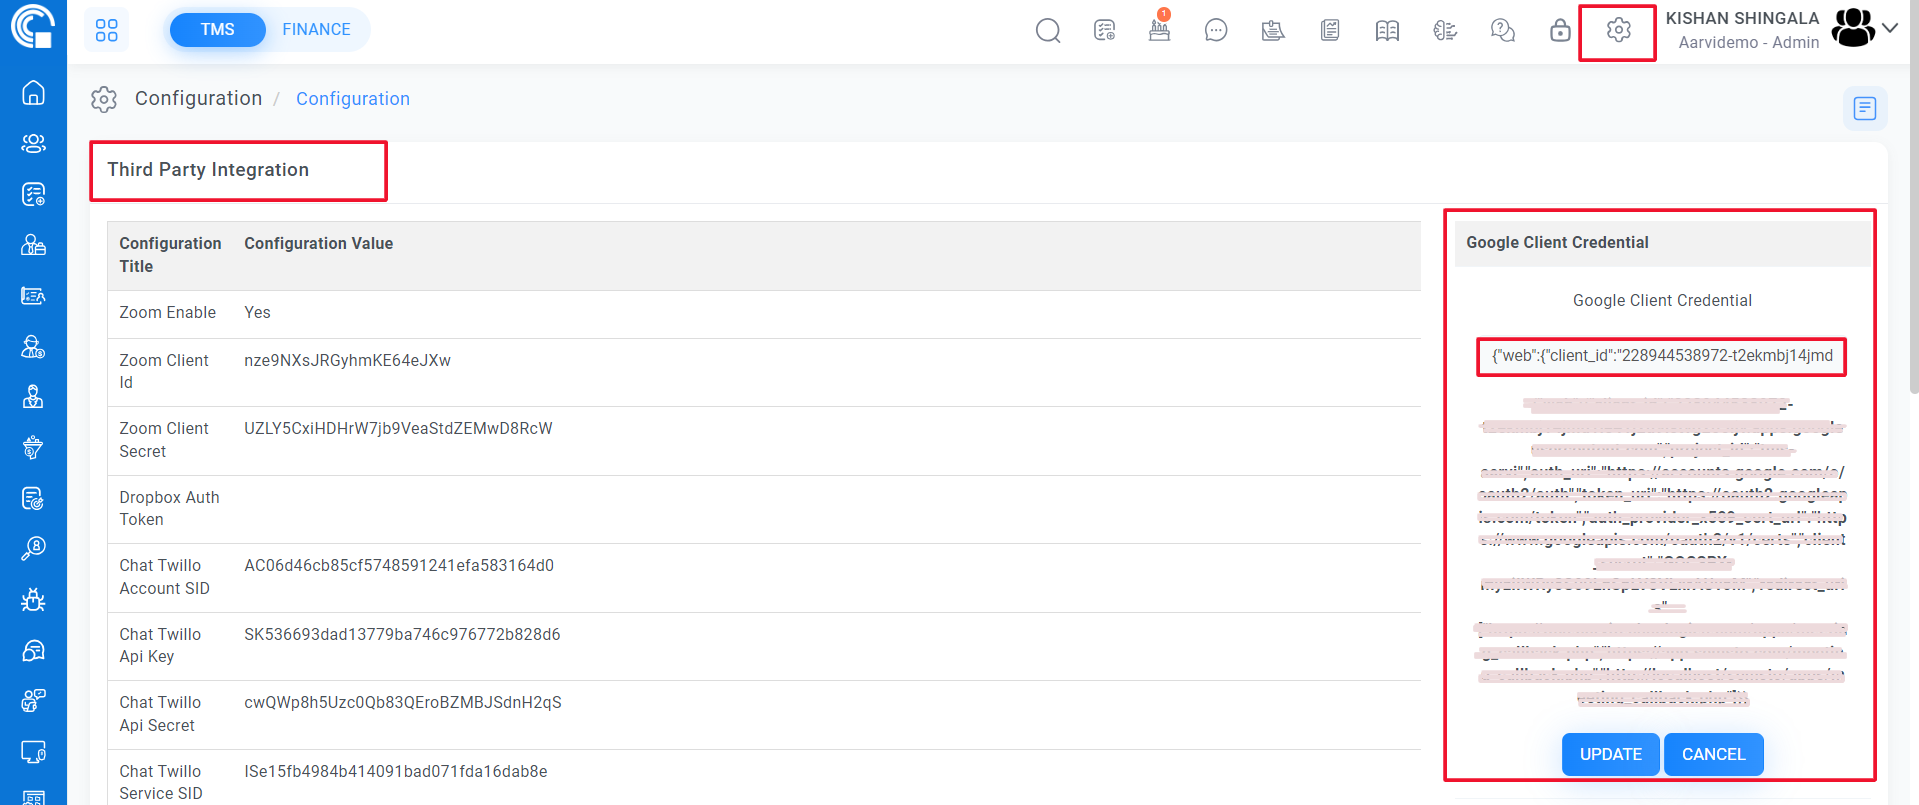
Now open downloaded json file and copy its content and paste in semsto > setting > Configuration > Third party > Google Client Credential